
Getting Started on the Trails
New to hiking here? You’re in exactly the right place. Northwest Arkansas has hundreds of miles of trail, and you don’t need much experience—or much gear—to start enjoying them this weekend. This page walks you from “I’ve never hiked these trails” to “I know what to bring, what to expect, and where to begin.” Take what’s useful, skip what isn’t, and we’ll see you out there.
Day Hiking · What to Expect · Difficulty · Reading a Route Card · What to Bring · Trail Etiquette · Caring for Trails · Staying Safe · Your First Hike
It’s all about day hiking
If most of what you’ve read about hiking involves multi-day treks, heavy packs, tents, and filtering your own water—set that aside. That’s backpacking and thru-hiking, and it’s a different sport.
Hiking in Northwest Arkansas is day hiking: you drive to a trailhead, walk for anywhere from twenty minutes to a few hours, and return to your car the same day. You’re rarely more than a couple of miles from a road or parking area. You sleep in your own bed that night.
That one fact changes everything about how you prepare. You don’t need survival gear or a giant pack—you need enough water, decent shoes, and a few small things for a few hours outdoors. So if a hiking tip elsewhere feels like overkill for a morning walk in the woods, it probably is. Everything on this page is scaled to our kind of hiking.
What to expect on NWA trails

A few things that are true almost everywhere you’ll hike around here:
- The trails are organized into systems. Rather than scattered footpaths, our trails come grouped into named networks—the Back 40, Slaughter Pen, Little Sugar—each with its own trailheads where you park and step on the trail. Learn about the trail systems.
- They’re multi-use, and they’re for you too. Most trails here are shared by hikers, walkers, runners, and mountain bikers alike. If you’ve wondered whether these trails are “really” for hiking—yes. You belong out here as much as anyone on two wheels.
- The terrain is Ozark. Expect rolling hills, water crossings, tons of shade, and rocky or root-covered sections mixed in with smooth, easy stretches. It ranges from flat to genuinely steep—which brings us to the next question everyone asks. What do those surfaces actually look like?
How difficult are the trails?
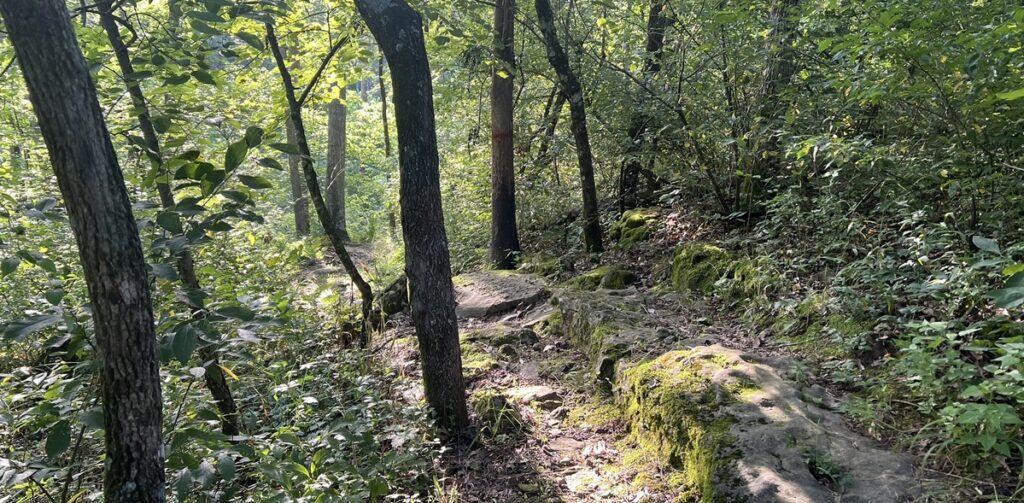
The single most useful thing for a newcomer to understand is how we rate difficulty, because you’ll see these labels on every route in the route library. We sort every route into four categories:
- Paved. Smooth, hard-surfaced paths 6 feet or wider, with no rocks or roots. Slope varies from flat to a few noticeable hills. Great for strollers, wheelchairs, and first steps. View examples of paved trail surfaces or browse all Paved routes.
- Easy. Natural-surface (dirt or gravel) trails about 3 feet wide or wider, gentle grades (averaging 5% or less), and stable footing. View examples of easy trail surfaces or browse all Easy routes.
- Moderate. Natural-surface trails around 2 feet wide with some steeper sections and rocks or roots up to about 8 inches. Good stability helps. View examples of moderate trail surfaces or browse all Moderate routes.
- Challenging. Narrow natural-surface trails (a foot wide or less), steep climbs and descents (15% grade or more), and frequent rocks or roots 15 inches and up. For confident, sure-footed hikers. View examples of challenging trail surfaces or browse all Challenging routes.
One distinction worth knowing: Paved is our only hard-surface category—every other badge is a natural-surface trail, meaning real dirt, gravel, rock, and roots underfoot. So stepping from Paved to Easy isn’t only about effort; it’s the difference between a sidewalk-smooth path and an actual woodland trail. See what a natural-surface trail looks like.
A frame of reference for “elevation gain”
Every route on this site lists its total elevation gain—how much climbing you’ll do over the whole hike. But a big total spread across a long hike and that same total packed into a short one feel completely different, so we also break it down to feet of climb per mile—the honest measure of how steep a route really is. Across all of our current routes:
(paved greenway)
How that compares to a mountain. Hikers often use a rough scale where anything under 100 feet per mile is flat-to-gentle, 200–400 is a moderate climb, and 400–600 feels genuinely steep. By that measure our trails are hills, not mountains—even our steepest route (around 140 ft/mile) barely counts as “rolling.” For contrast, a classic Great Smoky Mountains summit hike like the Alum Cave Trail up Mount LeConte climbs around 500 feet per mile, and a Rocky Mountain “fourteener” often piles on 600 to 1,000+ feet per mile. That makes Northwest Arkansas a genuinely welcoming place to build your legs and your confidence. When in doubt, start gentle and work your way up—you can always come back for more.
What to bring on a hike

Because this is day hiking, your list is short. For almost any hike here, you want:
- Water—more than you think. Our summers are hot and humid, and that’s the #1 thing that turns a nice hike into a miserable one. Bring water even for a short walk.
- Comfortable, closed-toe shoes with some tread. You don’t need boots for most of our trails; trail runners or sneakers are fine to start. If your route includes a water crossing, waterproof shoes are worth having, especially if it has rained recently.
- Your phone, with the route saved offline. Cell service drops out in the hollows, so screenshot or download your map before you leave the parking lot.
- A snack, sunscreen, and a small trash bag for your wrappers so you can pack out your trash.
Warm months (April–October)
- Heat and humidity are the real hazard, so bring plenty of water and start early.
- This is also tick and chigger season—use DEET or picaridin on exposed skin, and treat your shoes and clothing with permethrin (this is for fabric, not skin). A quick tick-check at mid-trail when you take a break and when you get home are good habits.
- Carry a “spider stick.” If you hike early in the morning or on a less-traveled trail, you’ll often be the first person through—which means walking face-first into overnight spider webs strung across the path. Carry a light stick and wave it gently in front of you as you go. A forked stick—like a “divining rod” shape—catches webs far better than a straight one, and you can usually find a good one right along the trail. If you turn up a keeper, toss it in your car for next hike.
Cooler months (November–March)
- Dress in layers you can shed as you warm up.
- Pay attention to early sunset—it gets dark faster than you’d expect, so carry a small headlight and keep an eye on the time.
Sharing the trail
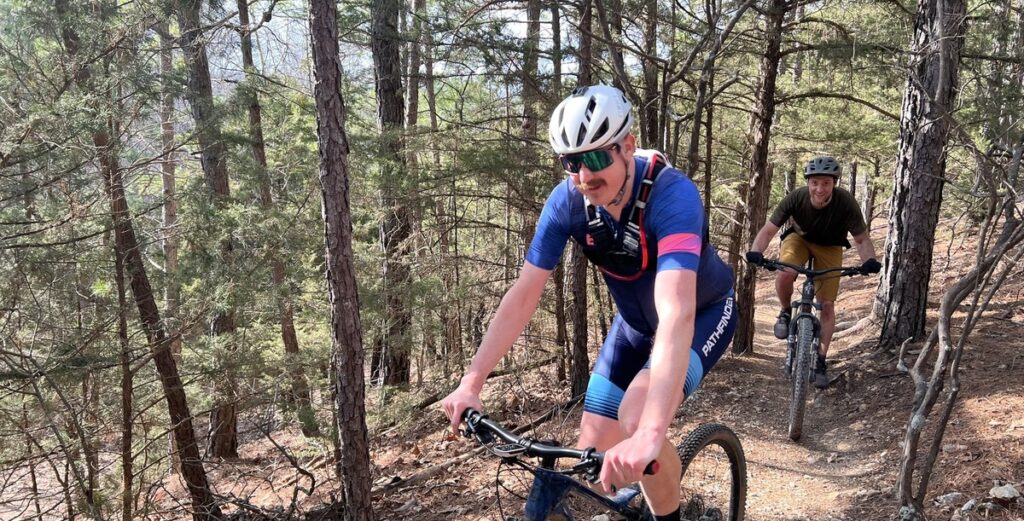
Since our trails are multi-use, a little etiquette keeps everyone safe and friendly. Here are the basics.
- Yielding etiquette for trail users: As a general rule, bikes are supposed to yield to hikers and trail runners, (and everyone yields to horses, although we rarely have horses on the trails). But in practice, bikes don’t always yield. So it’s best that whoever can step aside most easily should do so, which is usually the hiker or trail runner. Just step to the side, say hello, and let the faster traffic pass. And if you’re hiking with others, shout “Rider Up” if the cyclist is coming toward you, or “Rider Back” if the cyclist is behind you to let the others in your group know to step aside and make way.
- Announce yourself when passing anyone from behind. A simple, “On your left!” works well as you approach.
- Keep groups single-file on narrow trail, and keep music on a single headphone (or at a low volume) so you can hear bikes and other hikers coming.
- A note on bike-only trails: Some trails are technically open to hikers, but because they are meant for fast, downhill bike traffic or jumps, they don’t mix well with foot traffic. We list out the trails you should avoid on the individual trail system pages, and none of the routes in our route library include those trails that should be avoided.
Caring for the trails

Our whole mission is helping people enjoy and care for these trails. The good news is that caring for them is mostly about small habits.
- Pack it in, pack it out. Whatever you bring, take back out with you—including fruit peels and dog waste. Most trailheads have no trash service, so be prepared to take it home with you.
- Stay on the trail and don’t cut switchbacks. Those zigzags exist to protect the hillside from eroding. Cutting across them does real damage.
- Don’t hike muddy trails after rain. This is a big one in mountain-bike country—walking (or riding) soft, wet trail carves ruts that need to be be repaired. While many of our trails in NWA are just fine to hike after a rain (or even in the rain), some trails need a day or two to dry out. Routes that definitely be avoided after a rain are marked as such in our route library.
- Respect any posted closures. If a trail is marked as closed, don’t hike it. Period.
Staying safe
Day hiking here is low-risk, but a few habits make it lower still.
- Tell someone your plan—where you’re parking and roughly when you’ll be back.
- Heat and hydration are the most common problems in summer. Bring enough water and turn back if you feel overheated. There’s no prize for pushing through.
- Watch for ticks, poison ivy, and (rarely) snakes. Stay on the trail, and do that tick-check afterward, or even at your breaks mid-hike.
- Cell service is spotty in some places, so that offline map matters.
How to read a route card
Every route on hikenwa.org uses the same card layout, whether you find it in the Route Library, on a trailhead page, or in the Beginner’s Hiking Guide. Here is what each part tells you.

- 1Difficulty → the badge color and label show the route’s level
- 2Distance → how far the whole hike is
- 3Gain → the total feet of climbing across the hike
- 4Steepness → feet of climbing per mile. Bigger numbers mean a steeper, tougher hike
- 5Route shape → a loop returns to where it started, an out & back turns around and retraces the same path, and a lollipop is a loop with a there-and-back stretch at one end
- 6View Trailhead → opens the trailhead page with parking details and directions
- 7View Route on Komoot → opens the route in the free Komoot app so you can follow it as you hike
Ready for your first hike?
You’ve got the basics—now the fun part.
- Pick an easy route. Head to Find a Hiking Route and filter by distance and difficulty for a Paved or Easy route to start.
- Find where to park. Trailheads: Where to Park to Hike maps every trailhead and what to expect when you arrive.
- Don’t want to hike alone? Join the Bella Vista Walks & Hikes group. Newcomers always welcome.
Welcome to the trails. Hike more. Live more.